
It’s time…so in the spirit of the opening of the first advent door, I thought I would share an idea for an alternative advent calendar in case a little piece of chocolate just isn’t enough to satisfy you each day in the run up to Christmas. This also makes a great decoration which can hang on the wall or over a fire place (provided you don’t plan to turn the fire on). I also think this is a lovely idea for a Christmas party. You could decorate the biscuits without the numbers and then each person could pick their own gingerbread biscuit off from the display. A little bit of fun for the party season.
This is my version of gingerbread. Don’t worry – it does still have some chocolate in it. An advent calendar wouldn’t be an advent calendar without it.
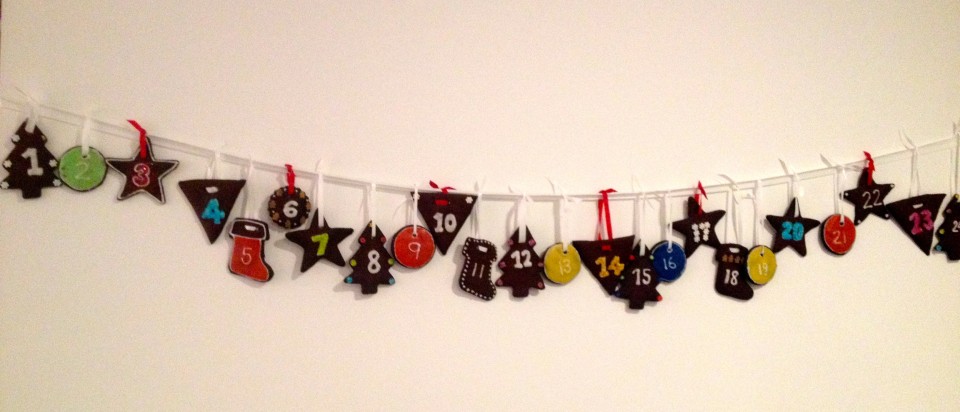
GINGERBREAD ADVENT CALENDAR
Ingredients (makes 24 biscuits and some extra for eating now):
120g brown sugar
120g butter, at room temperature
300g plain flour
50g cocoa
2 tsp ginger
1 tsp mixed spice
140g golden syrup
Icing sugar and sprinkles to decorate
- Preheat the oven to 180 degrees celsius.
- Mix the butter and sugar until smooth. Don’t worry about it being light and fluffy, just well mixed.
- Then add the flour, cocoa, ginger and mixed spice. This will create a light brown powder.
- Next add the golden syrup. Do this gradually as it takes a bit of time to mix in. The mixture will then form into a dark brown biscuit dough.
- Take a quarter of the dough and place it between two sheets of greaseproof paper. Roll the dough to a depth of 3mm. Then peel off the top layer of greaseproof paper and cut the dough using Christmas cookie cutters. I have also cut some circles to resemble Christmas bobbles and some triangles for variety.


- Bake for 15 – 20 minutes. Once the biscuits are ready, take them out of the oven and using a straw make small holes in each biscuit so that you can hang them later. You will have to work quickly while the biscuits are still hot to make sure that you remove a neat hole. Once the straw has been pierced through the biscuit, snip the end with scissors as it will be blocked with the excess biscuit and this will make it quicker to move on to the next biscuit. Place the biscuits back in the oven for 1 minute.
- Repeat until you have 24 biscuits.
- Allow to cool completely and then the fun starts with the icing.

You can do whatever you fancy with the icing. Here are a few ideas.


Once the icing has dried, you can prepare the biscuits for hanging. It is best to tie the biscuits individually onto the main length of ribbon so that you can easily remove the biscuits each day. This is quite a delicate job but it looks so effective once hanging. Just make sure to secure the ribbon to the wall or fireplace tightly so that you don’t have any late night crashes.


Pingback: Gingerbread and chocolate affogato | Isabelita's Larder